How to plan my work?
Plan your work and record issues
Section titled “Plan your work and record issues”Before writing any text, it is important to plan what needs to be done. Git provides tools like Issues, to help you organize your work visually and collaboratively.
So before starting, you can ask yourself and your team:
- What tasks need to be completed?
- Who is responsible for what?
- How do we break large problems into smaller, trackable tasks?
Why issues?
Section titled “Why issues?”Issues are like digital sticky notes used to track tasks, features, or bugs. They help you document your work and keep track of progress. Each issue has a title and description. You can comment, tag people, add labels, and so much more.
Open your first issue
Section titled “Open your first issue”On your repository’s main page, click on the Tab labeled 🔘 Issues.
Then, at the top-right corner, click on the green button labeled “New issue”.
In the newly opened page for issue creation, you are now asked to provide a title and a description for the issue.
It is mandatory to give it a title, but even though description is optional, it is strongly recommended to include one, as it will provide more detail.
The description is in Markdown syntax, which allows you to format the text to make it more readable.
Assignees, labels, and more
Section titled “Assignees, labels, and more”On the right-hand side of the issue creation page, you will find several options to further organize your issue.
- One or more assignees can be added to indicate who is responsible for the issue.
- You can add labels to your issues to categorize them (e.g., bug, feature, documentation, or even custom ones). Choosing appropriate labels can help in filtering and prioritizing issues.
- You can link the issue to a milestone if it is part of a larger goal or release.
- You can also link the issue to a project if you are using GitHub Projects to manage your work and visualize the progress in a Kanban-style board.
All these features help in organizing and managing your work effectively.
Relationships between issues
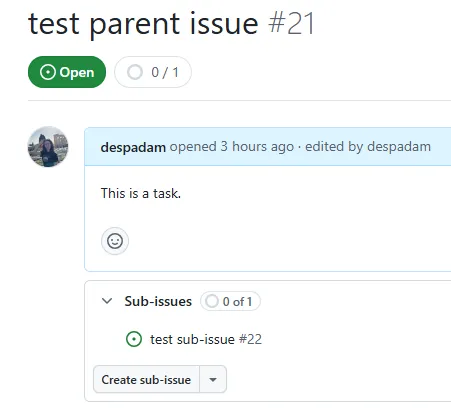
Section titled “Relationships between issues”It is also possible to link issues to each other, to provide parent-child relationships between tasks. After creating an issue, you can create sub-issues by clicking the “Create sub-issue” button underneath its description. After doing so, you will see the list of sub-issues linked to that parent issue. You will also see the status of the sub-issues (open or closed), as well as a count of how many sub-issues there are in total and how many of them are closed. Lastly, in each sub-issue you will see a link underneath its title, pointing back to the parent issue.
Note that you can always reference other issues in the description or comments of an issue by using # followed by the issue number (e.g., #5).
This will only create a link to that issue, but not a parent-child relationship.
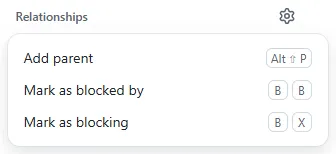
Lastly, have a look at the “Relationships” section on the right-hand side. In that section, not only can you add parent relationships to other issues, but also mention blocking relationships. That is, if one issue cannot be started or completed until another issue is resolved, you can indicate that by adding a blocking relationship and specifying which issue is blocking which.
Closing issues
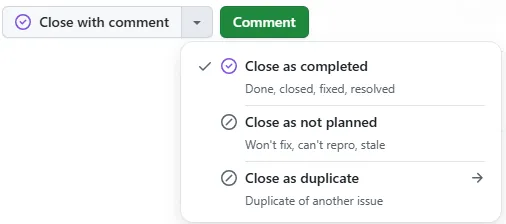
Section titled “Closing issues”Once a task is completed, you can close the relevant issue by clicking the button at the bottom of the issue page.
It is always useful to add a comment before closing, summarizing what was done to resolve the issue.
In the case that an issue is not going to be addressed, you can close it as not planned.
Otherwise, if you notice that more than one issues try to address the same task, you can close one of them as a duplicate of the other.
Note that you can always reopen a closed issue, if you realize that it was not fully resolved, by clicking the “Reopen issue” button at the bottom of the page.