
How to organize work
Organize your work with issues and branches
Section titled “Organize your work with issues and branches”We previously discussed how to work with issues and branches. Issues help you keep track of tasks, while branches allow you to work on different topics in parallel. Combining these two features can significantly enhance the productivity of your team.
Link branches to issues
Section titled “Link branches to issues”In general, when you create a new branch for a specific task, it is a good practice to link it to the corresponding issue.
To associate an issue with a branch, you can include the issue number in the branch name (e.g., 3-issue-name for issue #3).
This way we clearly indicate which issue that branch is addressing.
There is also a more automated way to link branches to issues:
-
Go to the page of the issue you want to work on.
-
On the right-hand side menu you will find a link called
Create a branch, under theDevelopmentsection.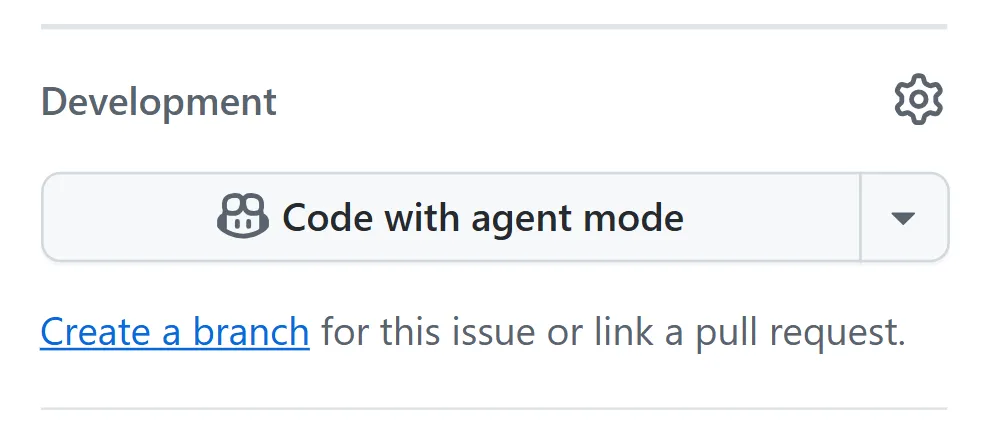
-
Clicking on this will open a dialog window where you can specify the name of the new branch. By default, the branch name will be created by using the issue number and title. You can modify the branch name, if needed, but it is recommended to keep at least the issue number in the branch name for clarity.
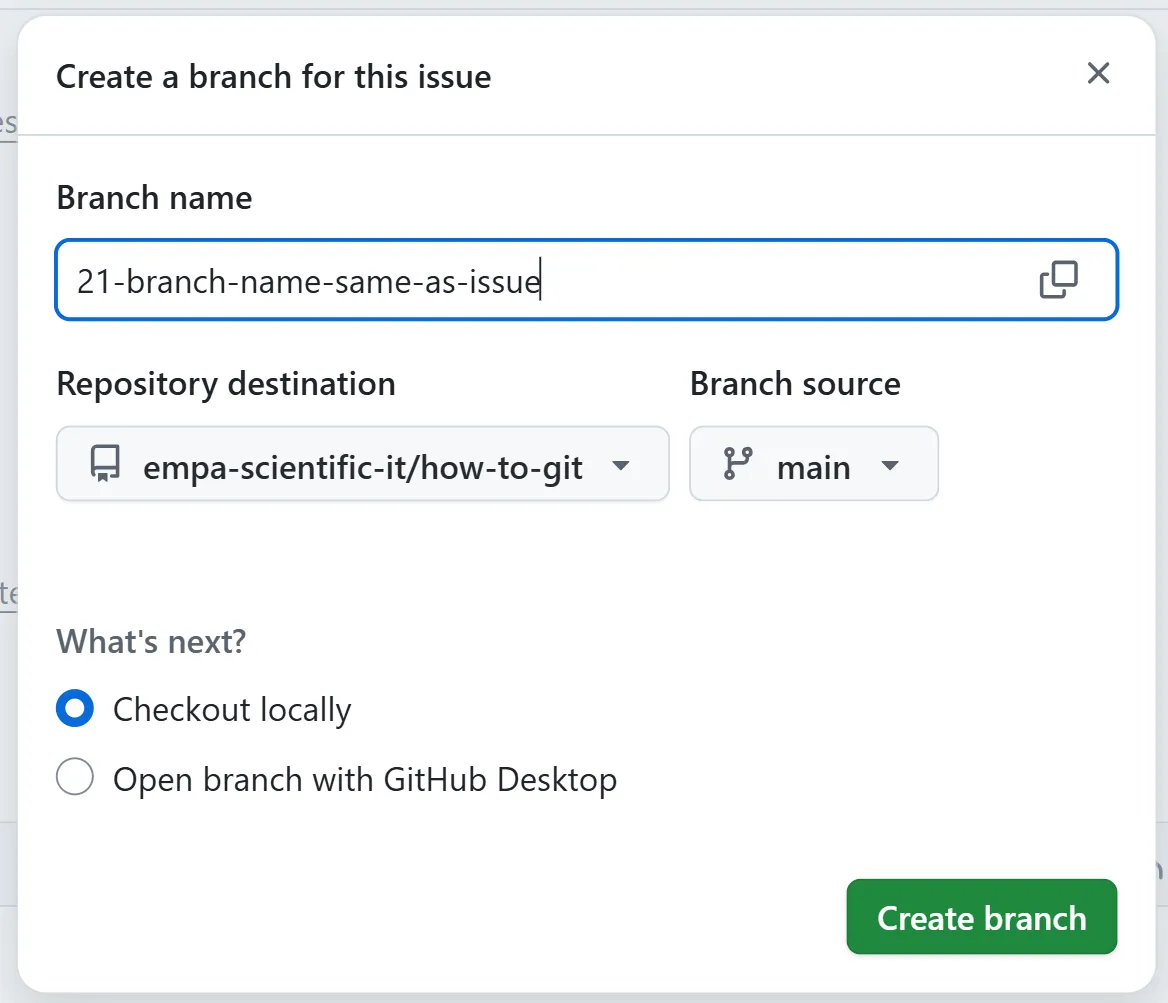
-
The option
Repository destinationpoints by default to the current repository you are working on. -
You can leave the option
Branch sourceset tomain, unless you have a specific reason to start from a different branch. -
Keep the option
Checkout locallyselected. -
Click on the green button
Create branch. -
Close any additional dialog window that may appear.
-
Switch to the new branch to start working on the issue.
-
Go to the page of the Work Item you want to work on.
-
Look for the dropdown button that offers the option to create a branch from that issue.
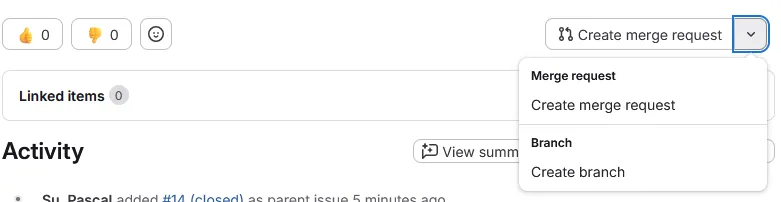
-
Clicking on
Create branchbutton will open a dialog window where you can specify the name of the new branch. By default, the branch name will be created by using the issue number and title. You can modify the branch name, if needed, but it is recommended to keep at least the issue number in the branch name for clarity.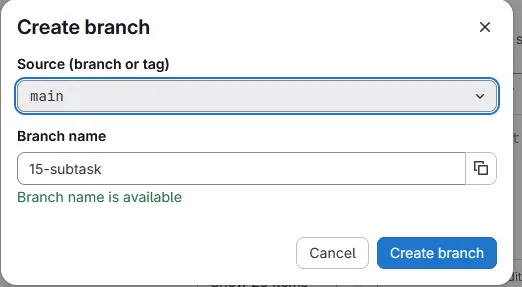
-
You can leave the option
Sourceset tomain, unless you have a specific reason to start from a different branch. -
Click on the blue button
Create branch. -
Switch to the new branch to start working on the work item.
Closing an issue with a branch
Section titled “Closing an issue with a branch”Once you consider an issue to be completed and you are ready to merge your branch, it is time to create a pull request.
It is a good practice to link the corresponding issue to the pull request, by adding it to the pull request’s description.
To do that, you can simply write # followed by the issue number (e.g., #3) and the link will be automatically created.
If you also combine that with specific keywords then the issue can be automatically closed when the pull request is merged.
For example, you can write Closes #3 or Fixes #3 in the pull request description.