
How to collaborate with others
The fact that a repository can be private or public already influences its basic access management, as discussed in the Public vs Private repositories section. However, there are advanced features that allow you to manage access to the repository in more detail.
Manage access to the repository
Section titled “Manage access to the repository”A GitHub repository can belong either to an individual user or to a GitHub organization (a group of users):
- If the repository belongs to an individual, that user is the owner and has full administrative control.
- If the repository belongs to a GitHub organization, then the organization owners are the admins of all repositories within the organization.
To invite collaborators to a privately owned repository, you can open the repository on GitHub, click on the Settings tab, and then select Collaborators from the left sidebar.
There, you can find the Manage access section, where you can invite collaborators by their GitHub username.
When you invite a collaborator, they will receive an email notification and will need to accept the invitation to gain access to the repository.
After the invitation is accepted, the new collaborator will be assigned a collaborator role with write access to the repository.
The situation is a bit different for repositories that belong to an organization.
First, an organization can have two types of membership: owners and members.
At the same time, the repositories within the organization can have separate access control.
To invite people to a repository that belongs to an organization, you can click on the Settings tab of the repository, then select Collaborators and teams from the left sidebar, and then click on the Add people button.
You can then search for the GitHub username of the person you want to invite and select them.
If the invited person is not a member of the organization, they will be added as an outside collaborator.
After selecting the person, you can assign them a role for the repository (see below) and click Invite.
The role can be one of the following: Read, Triage, Write, Maintain, or Admin.
- The
Readrole allows the user to read and clone the repository, which is just the same right as for any user in case of a public repository, so it only makes sense for private ones. - The
Triagerole allows the user to manage issues and pull requests without write access to the code (e.g., they can label, close, or assign issues and pull requests). - The
Writerole allows you to push changes to the repository, it also allows you to approve pull requests. - The
Maintainrole gives you more permissions to manage the repository, such as managing branches and settings, but it does not allow you to delete the repository or manage access. - The
Adminrole gives you full control over the repository, including managing access and deleting the repository.
After the invitation is accepted, the new collaborator will also be listed as an outside collaborator in the People section.
Manage access to the repository
Section titled “Manage access to the repository”A GitLab repository can belong either to an individual user namespace or to a group.
- If the repository belongs to an individual namespace, that user has administrative control.
- If the repository belongs to a group, then group owners or maintainers may be able to manage access depending on the configuration.
To invite collaborators to a privately owned repository, you can open the project on GitLab, go Manage > Members on the left-hand side menu, and invite collaborators by their GitLab username or email.
When you invite a collaborator, they will receive a notification and will need to accept the invitation to gain access to the repository.
After the invitation is accepted, the new collaborator will be assigned a role in the project.
The situation is a bit different for repositories that belong to a group.
The repositories within the group can have separate access control.
To invite people to a repository that belongs to a group, you can open the project’s member management section and add the person you want to invite.
After selecting the person, you can assign them a role for the repository and confirm the invitation.
The role can be one of the following: Guest, Reporter, Developer, Maintainer, or Owner.
- The
Guestrole allows users to view basic project information. - The
Reporterrole allows users to read the project and follow progress. - The
Developerrole allows users to push changes to the repository and work with branches and merge requests. - The
Maintainerrole allows users to manage project settings and collaboration more broadly. - At the group level, there is also an
Ownerrole.
In practice, the smallest useful role depends on what the collaborator needs to do. For example, a reporter can read and follow the work, while a developer can contribute code. Choosing the smallest role that still allows the person to do their work is usually a good idea.
Collaborate on public or open-source software repositories
Section titled “Collaborate on public or open-source software repositories”When you want to contribute to a public repository that you do not have write access to, the standard approach is to use a fork. A fork is a personal copy of someone else’s repository that lives under your own account. Because you own the fork, you can freely experiment, fix bugs, or add features without affecting the original project. Once your changes are ready, you can propose them back to the original repository by opening a pull request.
Forking a repository
Section titled “Forking a repository”-
To fork a repository on GitHub, navigate to the repository you want to contribute to and click the
Forkbutton in the top-right corner.

-
GitHub will create a copy of the repository under your own account. Before confirming the fork creation you may edit the name and description of the fork, but it is recommended to keep the original. Unless you want your fork to include the rest of the original repository’s branches, it is best to copy the
mainbranch only.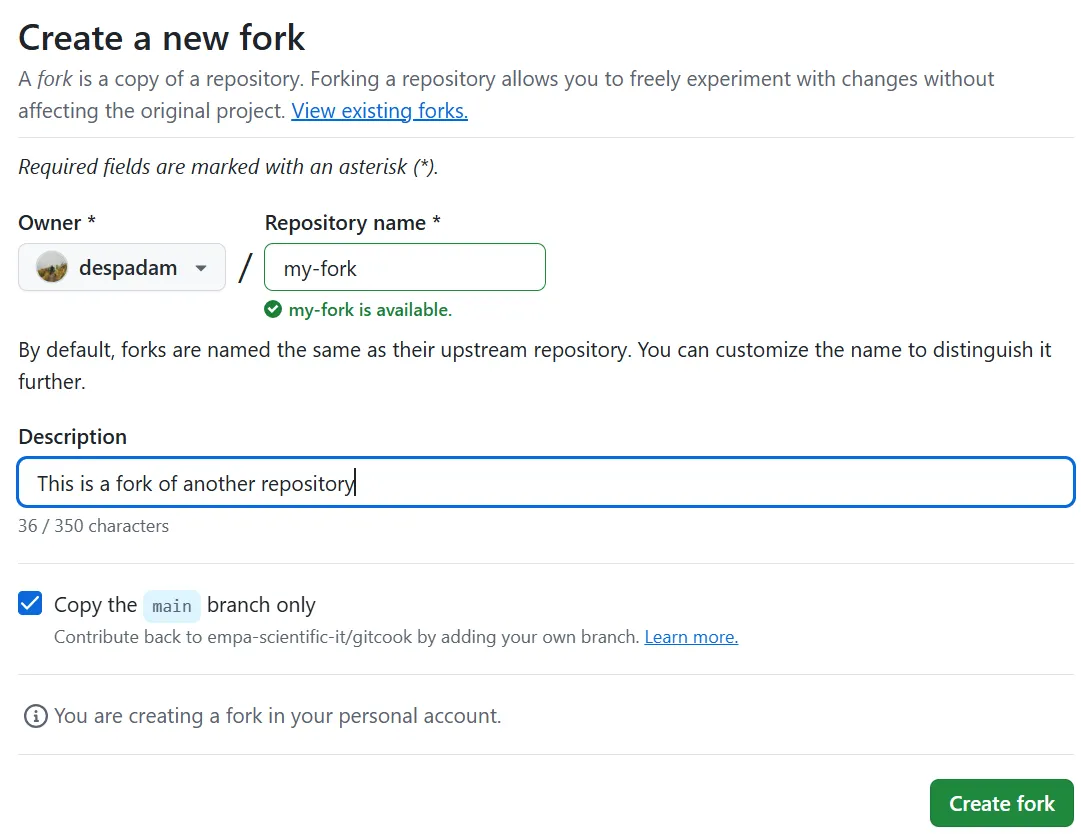
-
To fork a repository on GitLab, navigate to the project you want to contribute to and click the
Forkbutton near the top of the page.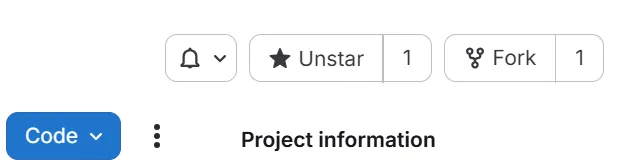
-
Before confirming the fork creation you may edit the name, slug, and description of the fork, but it is recommended to keep the original. Gitlab will also ask you to choose a namespace under
Project URL, which can be your personal namespace or a group you belong to. Unless you want your fork to include the rest of the original repository’s branches, it is best to copy themainbranch only. Lastly, select the visibility level.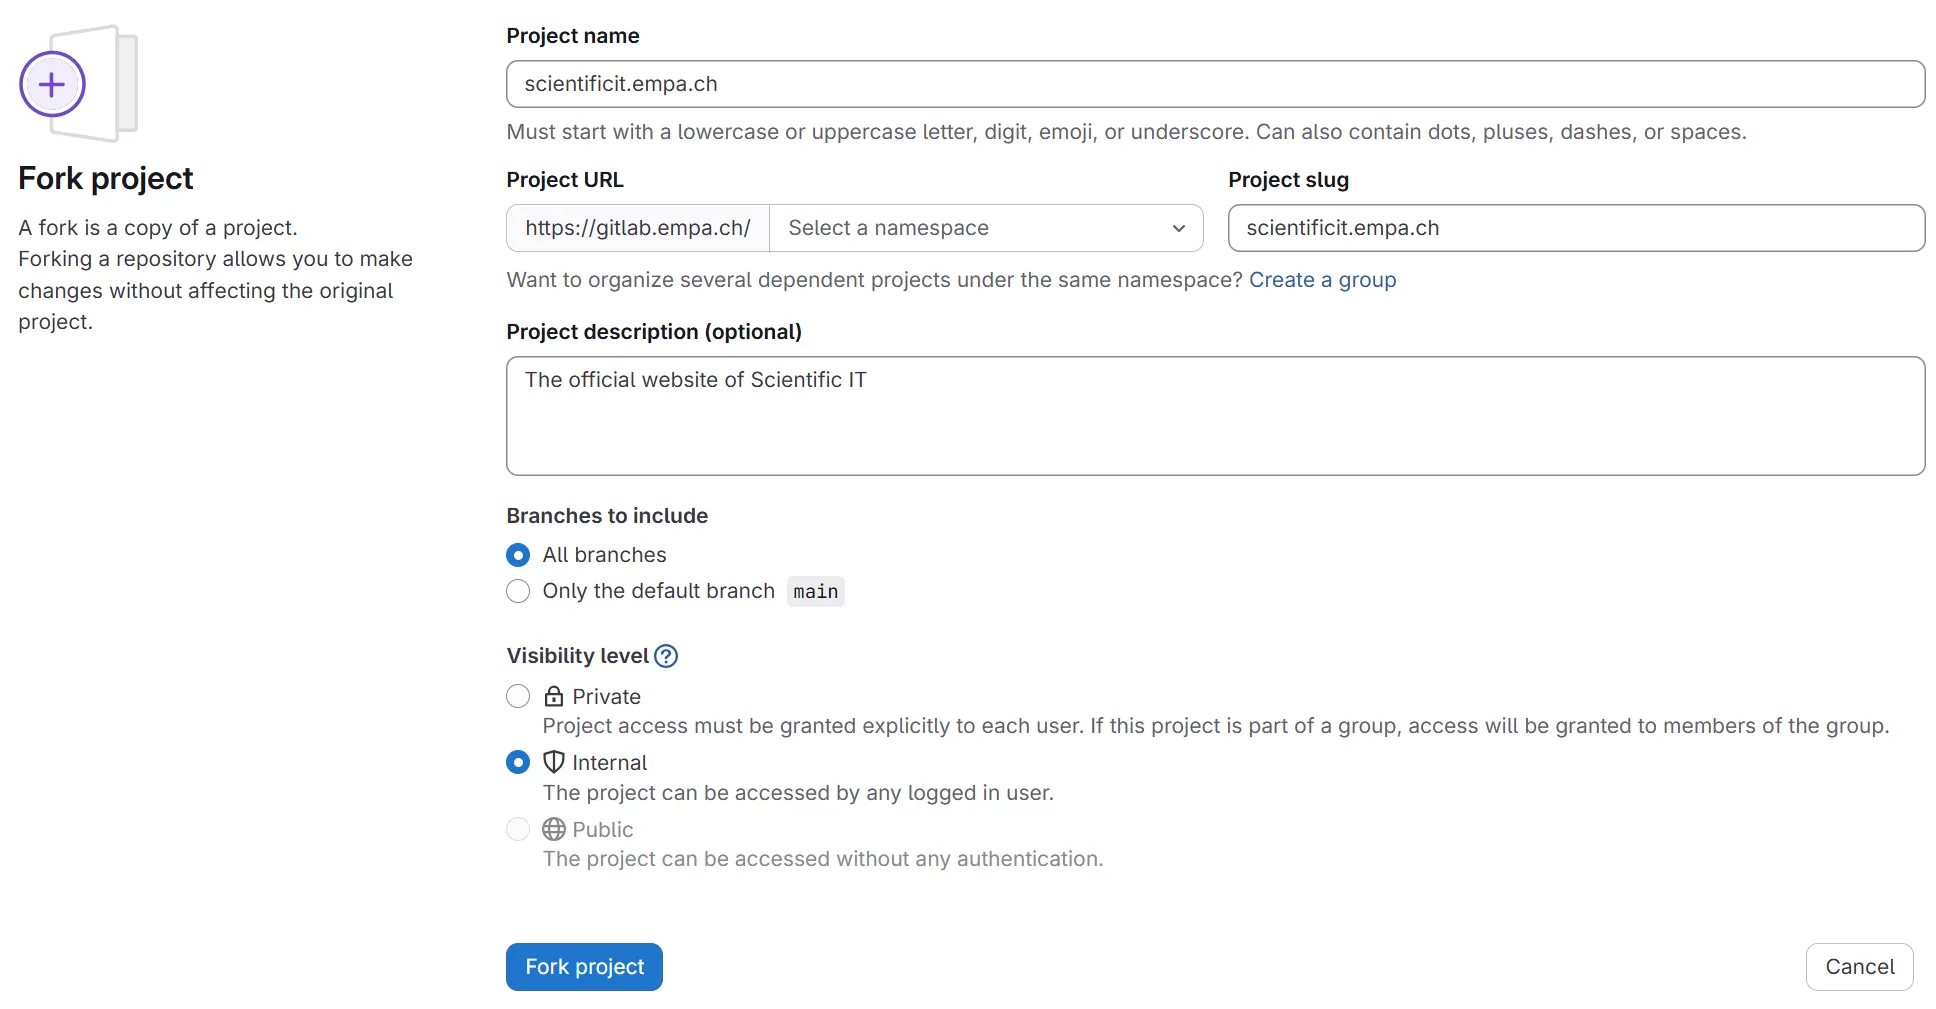
Once you have a fork, clone it as described in Work with Git locally to work on it from your machine.
It’s also common to add the original repository as a second remote, usually called upstream, so you can pull in its future changes:
git remote add upstream <original-url>git fetch upstreamgit merge upstream/mainReport problems and give suggestions
Section titled “Report problems and give suggestions”As a collaborator, if you find a problem or have a suggestion for improvement, you can create an issue in the repository. This is a great way to communicate with other contributors and help improve the project. The process for creating an issue is the same as described in this guide.