
How to share work with people
What is a Git repository?
Section titled “What is a Git repository?”A Git repository is a folder that contains all the files and folders related to a project. Beyond that, it also contains the history of all changes made to them. Further in the tutorial, we will learn how to use Git to manage a repository: track changes, work on different topics in parallel, collaborate with others, and more.
Create a repository
Section titled “Create a repository”The first thing you do with Git is to create a repository. The repository serves as a place to store files.
To create a repository, please go to your GitHub account, select the Repositories tab and click on the green New button.
Alternatively, you can click on this link.
In GitLab, the repository usually lives inside a project.
To create a repository, please go to GitLab home page and on the left-hand side menu click on Projects.
Then, click the blue New project button.
Alternatively, you can click on this link.
In the newly opened page, please fill in the following fields:
-
Set the repository name
-
Set the description (optional)
-
Set the visibility (Public by default)
-
Leave the rest of the options set to default
-
Click on the button
Create repository
-
Choose to create a blank project
-
Set the project name
-
From the dropdown under project URL select your username to create a personal project
-
Edit the project slug if needed
-
Set the visibility (Internal by default)
-
Leave the rest of the options set to default
-
Click on the button to
Create project
Congratulations, you have created your first repository!
Public vs Private repositories
Section titled “Public vs Private repositories”When creating a repository, you can choose whether it will be public or private. This choice affects who can see the content of the repository and affects how you can collaborate with others.
-
Public repository: Anyone can see the content of the repository. This is useful for open-source projects or when you want to share your work with the world. The repository can be forked, which means that anyone can create a copy of the repository and work on it independently. People can also report issues, suggest changes, and contribute to the project.
-
Private repository: Only you (the owner of the repository) and the people you invite can see the content of the repository. This is useful for personal projects or when you want to keep your work private. You can still invite people to collaborate on the repository, but they will need to have an account and be granted access explicitly.
Setting the visibility of the repository is the initial step in controlling access to content and collaboration features. You can manage access to the repository in more detail using features, such as granting read or write access to specific people or teams. However, those details will be discussed later in the Manage access to the repository section.
Internal repositories
Section titled “Internal repositories”GitLab offers the possibility to create Internal repositories.
This means that only people working at Empa can see the content of the repository, as long as they are logged in to their GitLab account. This is useful for internal projects that are not meant to be accessed by external users. You can still invite external people to collaborate on the repository, but they will need to be granted access explicitly and allowed to create an Empa GitLab account.
Add a file to the repository
Section titled “Add a file to the repository”To add a file to the repository you have the option to directly create a new file or upload an existing one. You can do that from the repository’s main page:
Click on the Add file dropdown button.
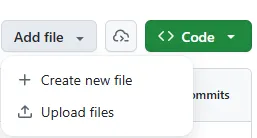
If you choose to upload an existing file then in the newly opened page you can drag and drop any file you wish.
Instead, if you choose to create a new file, this will lead you to a new window:
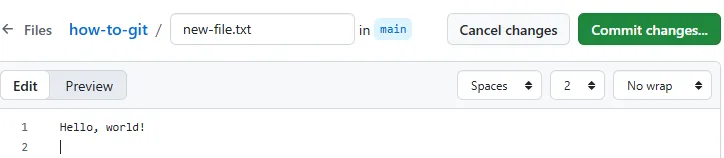
Give your file a name and do not forget to add the file extention as well.
Once you are done writing the content, click on the Commit changes button.
Click on the ➕ dropdown button.
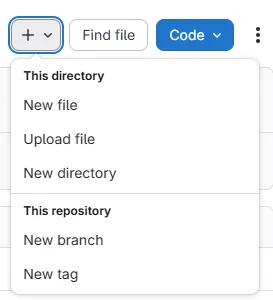
If you choose to upload an existing file then in the newly opened page you can drag and drop any file you wish.
Instead, if you choose to create a new file, this will lead you to a new window:
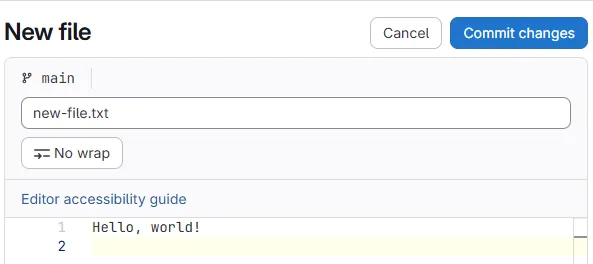
Give your file a name and do not forget to add the file extention as well.
Once you are done writing the content, click on the Commit changes button.
If you have a local copy of the repository, create or edit the file with any editor, then use the CLI to add, commit and push it:
git add <file-path>git commit -m "Add <file-path>"git push