
How to work with Git locally
So far, we have covered working directly in the browser. It is also possible to work with Git directly from your local machine, using either the command line or a graphical Git tool. The command line is the most common way to interact with Git and works the same everywhere.
Install and configure Git
Section titled “Install and configure Git”First, install Git for your operating system.
Then, tell Git who you are - this information is attached to every commit you make:
git config --global user.name "Your Name"git config --global user.email "your.email@example.com"Download an existing repository
Section titled “Download an existing repository”To get a local copy of an existing repository, use git clone with its URL:
git clone <url>You can find that URL on the repository’s main page:
Click the green Code button and copy the URL shown there.

Click the blue Code button and copy the URL shown there.

This is also how you start working locally after forking someone else’s repository: clone your fork the same way.
Start your own new project
Section titled “Start your own new project”If you’re starting your own work instead of downloading someone else’s, first create the repository on the web as usual - there is no local-only equivalent for that step. Then either clone the empty repository as above, or, if you already have a local folder that you want to turn into a repository, initialize it and connect it to the remote you just created:
git initgit remote add origin <url>Authenticate
Section titled “Authenticate”The steps above work as-is for a public GitHub repository, since reading it requires no authentication at all.
You’ll only run into a permission wall once you try to push, or clone/pull something private - at that point Git will ask you to authenticate.
Empa’s GitLab is internal-only, so there it applies from the very first clone.
There are two common ways to authenticate:
SSH keys are the recommended way. It’s a key pair that lives on your machine, of which you register the public half with GitHub/GitLab once.
ssh-keygen -t ed25519 -C "your.email@example.com"This creates a private and a public key.
Add the private key to your SSH agent so you don’t need to type its passphrase every time.
ssh-add needs the agent to be running first, and how you start it differs by platform:
eval "$(ssh-agent -s)"ssh-add ~/.ssh/id_ed25519Using Windows’ built-in OpenSSH client, in a PowerShell window opened as Administrator (required to change the service’s startup type - you only need to do this once):
Set-Service ssh-agent -StartupType AutomaticStart-Service ssh-agentFrom then on the agent starts automatically, so in any regular (non-admin) PowerShell window you can just run:
ssh-add $HOME\.ssh\id_ed25519Then copy the contents of the public key file and paste it into your account settings:
pbcopy < ~/.ssh/id_ed25519.pub(on Linux without pbcopy, use xclip -selection clipboard < ~/.ssh/id_ed25519.pub, or just print it and copy it manually: cat ~/.ssh/id_ed25519.pub)
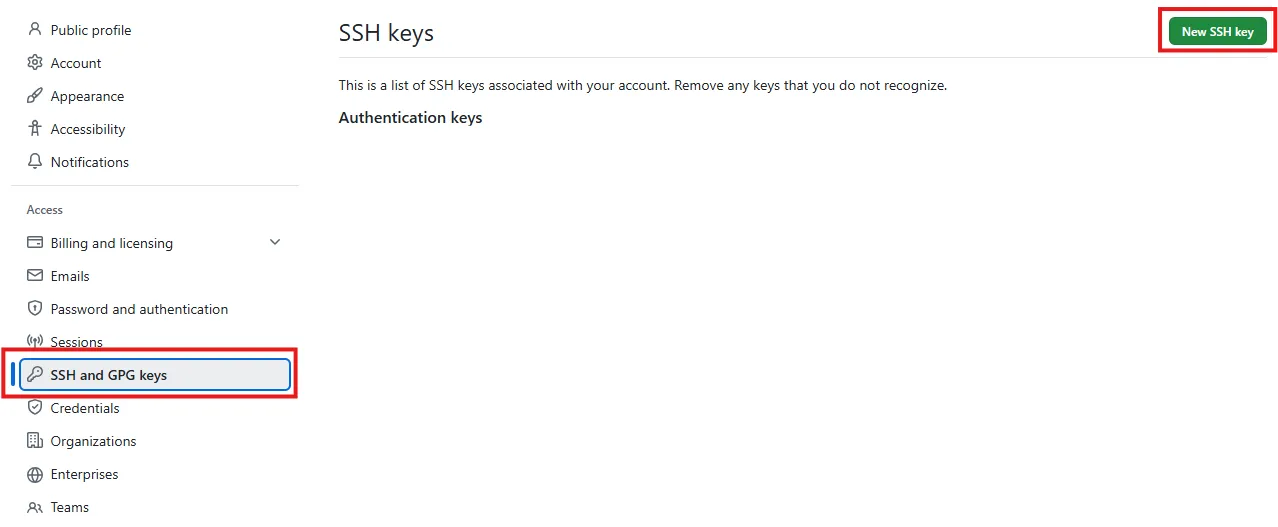
Get-Content $HOME\.ssh\id_ed25519.pub | Set-ClipboardUnder Settings > SSH and GPG keys > New SSH key. See GitHub’s guide for more detail.
Under Edit profile > SSH Keys. See GitLab’s guide for more detail.

From then on, use the git@... (SSH) form of the repository URL when cloning.
Alternatively, HTTPS with a Personal Access Token (PAT) is a lighter-weight option if you’d rather not manage SSH keys, or if your network blocks SSH. You generate a token once on GitHub/GitLab and use it in place of a password when Git asks for one. See GitHub’s PAT docs or GitLab’s PAT docs for how to create one.